OpenShot Video Editor 2.4.4 is a powerful open source video editor for PC, very easy to use and master, and you can create all kinds of movies
If you want to get hold of a powerful video editor that gives you lots of options and functions to unleash your creativity when enhancing your images, you can use OpenShot Video Editor for PC Windows which is also an open source to use. you can download it and use it for free.
Easy to use and free video editor
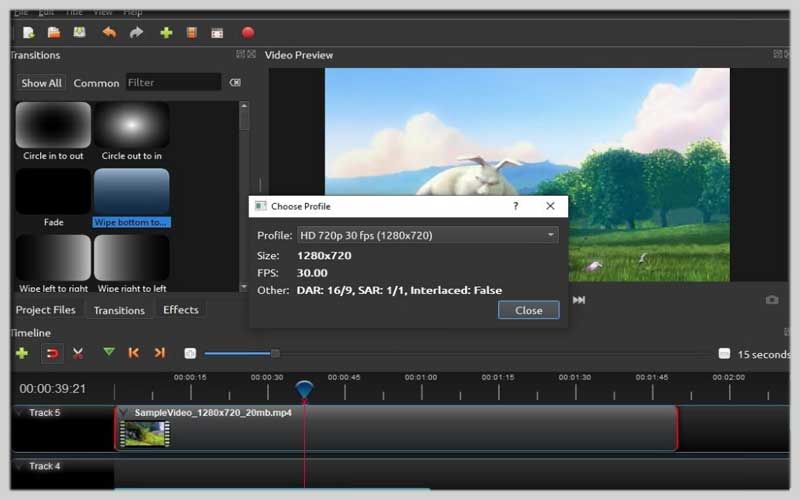
This video editor for Windows provides us with different tools with which we can create all kinds of movies adding subtitles, transitions and effects, can export the final result to formats as DVD, YouTube, Xbox or Vimeo.
These are the main features:
- Add audio, video or still images by dragging and dropping them into the edit panel.
- Add more layers if you need thanks to its unlimited tracks.
- Label your videos with the editor.
- Trim and split any video.
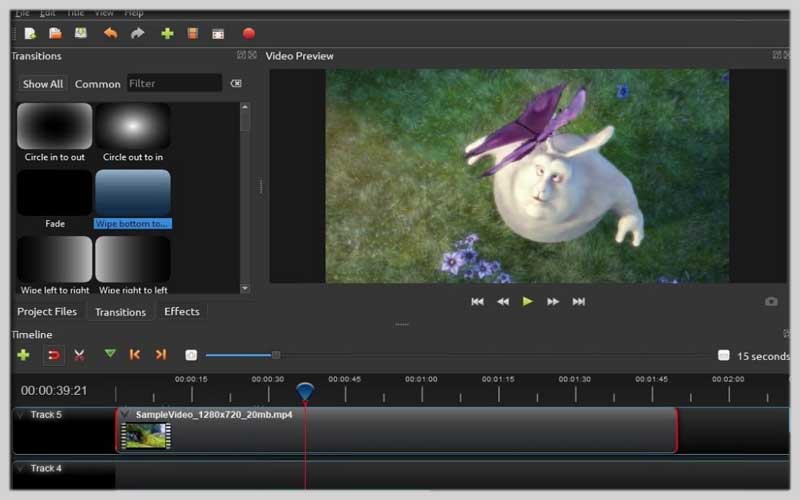
- Apply all kinds of video effects.
- Create 3D animations for titles and effects such as snow, optical reflections, or embossed text.
- View waveforms of audio files.
- Create time effects and slow motion.
- And all the latter in more than 70 different languages and by a very simple user interface.
Unleash Your Inner Filmmaker: A Guide to OpenShot Video Editor
OpenShot is a free, open-source video editor available for Windows, Mac, and Linux. It offers a user-friendly interface and a surprising amount of power, making it a great choice for both beginners and hobbyist video editors. Here’s a roadmap to get you started with creating compelling videos using OpenShot:
1. Download and Installation:
- Head over to the OpenShot website: https://www.openshot.org/download/
- Download the installer for your operating system (Windows, Mac, or Linux) and follow the on-screen instructions to complete the installation.
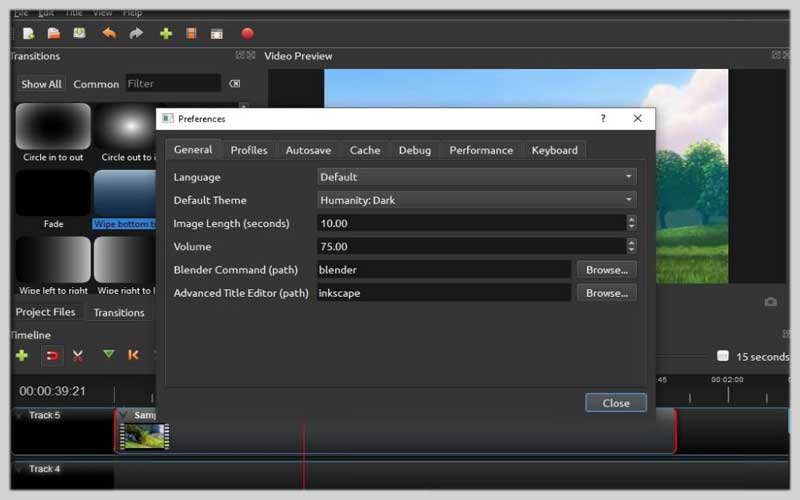
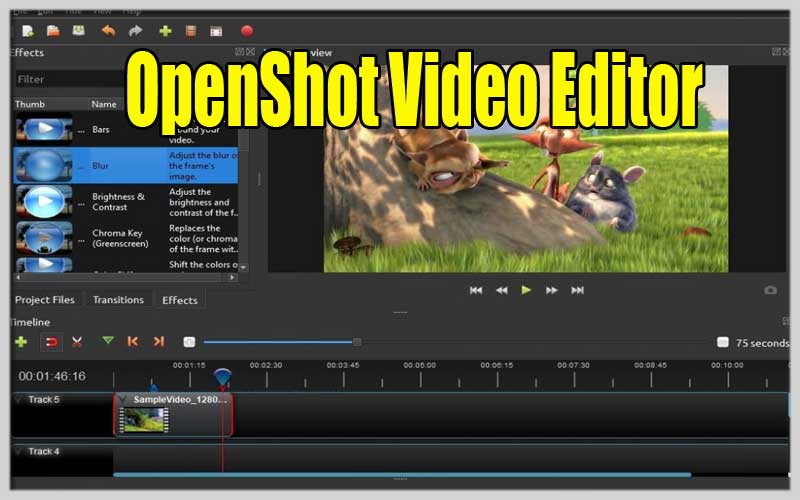
2. User Interface:
- Upon launch, OpenShot presents a clean and intuitive interface. Here’s a breakdown of the key areas:
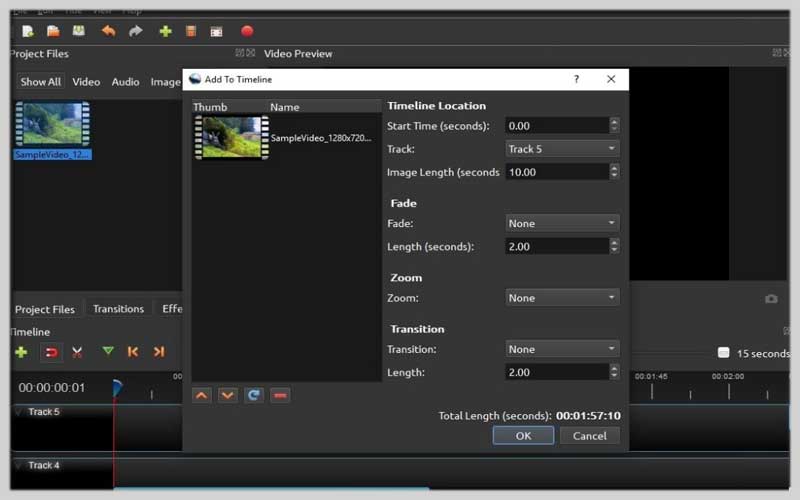
- Project Files: This pane displays thumbnails of your imported video clips, photos, and audio files for easy access and organization.
- Timeline: This is your editing workspace. Here, you arrange your clips, photos, and audio tracks in the desired sequence to build your video.
- Preview Window: Displays a real-time preview of your edited video as you make changes.
- Tools and Effects: Provides a toolbar with buttons for common editing functions, transitions, effects, and titles.
3. Importing Media:
- Click the “Import Files” button (folder icon) or go to “File > Import Files” to browse your computer’s files.
- Select the video clips, photos, and audio files you want to include in your video project. OpenShot supports a wide variety of media formats, ensuring compatibility with most multimedia files.
4. Building Your Video (Timeline):
- Drag and drop your media files from the project files pane onto the timeline tracks. You can have multiple video and audio tracks, allowing you to create layered and visually engaging videos.
- Arrange the clips in the order you want them to appear in your final video. You can easily drag and drop clips to rearrange them or use the “Cut” and “Paste” functions.
5. Basic Editing Techniques:
- Trimming Clips: Drag the yellow handles at the beginning and end of a clip in the timeline to shorten it. You can also right-click on a clip and choose “Trim” for more precise editing options.
- Splitting Clips: Use the razor blade icon in the toolbar or right-click on a clip and choose “Split” to cut a clip into sections. This allows you to rearrange or delete unwanted portions.
Screenshots