Movavi Video Editor 22.2.1 allows you to create movies with your recordings on your PC. It is very simple to use and comes with many functions for perfect footage

Nowadays, creating impressive montages is really easy. With any regular PC and the right software, you’ll have enough.
Because your video collection is never the problem: we all go on holiday, to a wedding or celebrate a goal our kids score, capturing all those special moments on our phones. smart, reflex camera or dedicated video camera.
Well, you should know that raw files are a must but all the magic lies in the subsequent editing. Just admit it, a video lost on an SD card is not fun at all.
Movavi Video Editor for PC Windows is a complete video editing tool with which you can create your own movies. Import your recordings, get the most out of all its editing tools, and ultimately create a beautiful movie that you can upload to your social networks and YouTube.
Main features
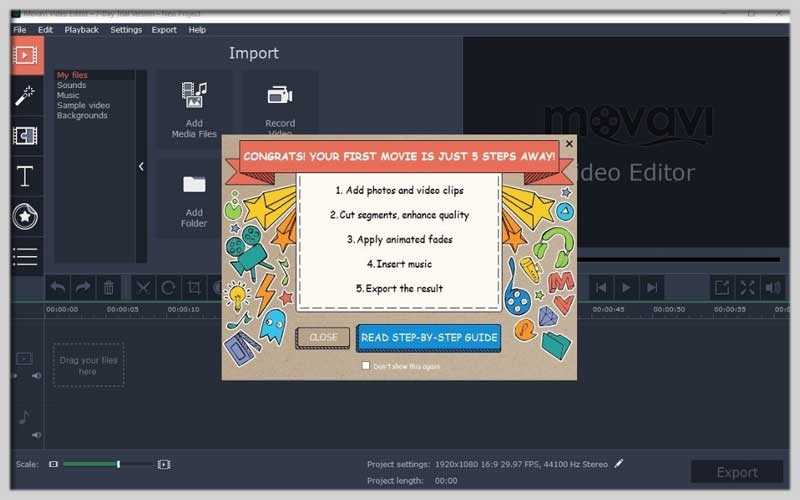
- A guide to getting started and quickly understanding various concepts.
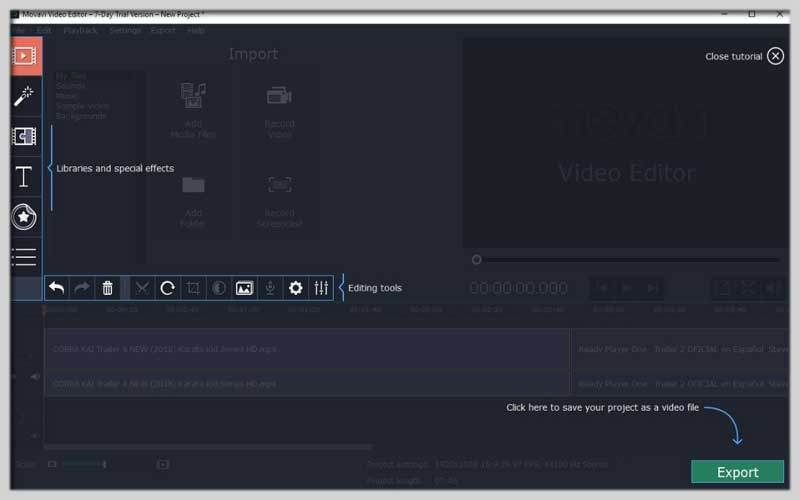
- An easy-to-use interface has been simplified with options that anyone can easily understand.
- Import all types of multimedia files, whether videos, photos or images.
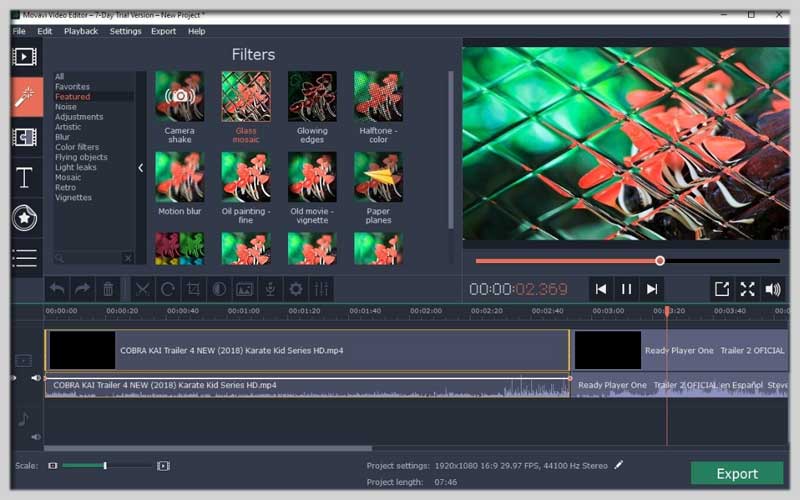
- Amazing collection of video filters.
- Various types of transitions are applied between clips.
- Ability to add text and stickers to images.
- Includes video stabilization in case you get unstable.
- Compatible with the use of tints.
- Automatically create videos
This is one of the newest functions added to the software and also one of its most interesting features. When you have hours of footage, you waste too much time searching and selecting the parts that really interest you.
The staff at Movavi are aware of this situation and have developed an editing mode in which the program automatically selects the frame and proceeds to edit the movie.
Don’t waste more time than necessary. If you have no intention of conquering Hollywood, the result is absolutely perfect.
Screenshots


Craft Compelling Videos: A Guide to Movavi Video Editor
Movavi Video Editor is a user-friendly program that empowers you to create professional-looking videos on your Windows or Mac computer. Whether you’re a beginner or a more experienced editor, Movavi offers a range of tools to bring your vision to life. Here’s a roadmap to get you started:
1. Getting Started:
- Download and install Movavi Video Editor from the official website (https://www.movavi.com/).
- Launch the program and choose your preferred editing mode:
- Easy Mode: A simplified interface ideal for quick edits with drag-and-drop functionality.
- Full Feature Mode: Offers a wider range of editing tools for more granular control over your project.
2. Importing Media:
- Click the “Add Media Files” button or drag and drop your video clips, photos, and audio files directly into the program window.
- Movavi supports various media formats, ensuring compatibility with most video and audio files.
3. Building Your Video (Timeline):
- The timeline is your workspace where you assemble your video. Drag and drop media clips onto the timeline tracks to arrange them in the desired sequence.
- You can use multiple tracks for video, audio, and even titles or captions.
4. Editing Techniques:
- Trimming & Splitting: Shorten clips by dragging the yellow handles at the beginning and end on the timeline. Use the “Split” tool to cut a clip into sections for rearrangement or deletion.
- Transitions: Add smooth transitions between clips for a polished look. Choose from various dissolve, fade, or wipe effects from the “Transitions” tab.
- Filters & Effects: Enhance your video with creative filters and effects. Explore options like color correction, slow motion, or artistic filters. (Availability may vary depending on your version).
5. Adding Polish:
- Titles & Text: Create titles, captions, or text overlays using the “Titles & Text” tab. Customize fonts, colors, animations, and positioning to suit your video’s style.
- Audio Editing: Adjust audio levels for individual clips or add background music using the audio editing tools. You can also record voiceovers or add sound effects.
6. Exporting Your Masterpiece:
- Once you’re happy with your edit, click the “Export” button.
- Choose your desired output format (e.g., .mp4, .mov) based on your target platform or workflow.
- Movavi offers presets for popular video-sharing websites like YouTube or social media.
- Customize export settings like resolution, frame rate, and audio quality for optimal results.
- Click “Export” to render your final video and share your creation with the world!