With Nero Video 2020 22.0.00700, you can edit and create video discs. Download Nero Video for PC and discover one of the most modern solutions for editing and creating HD content

Nero Video is Nero’s solution for video editing and creating your own discs, both DVD and Blu-ray. Explore all the content turn video capture into a creative adventure.
The developers of the best burning software of all time, Nero, have a full range of products related to this purpose. Thus, they complete their offer with Nero Video focusing on multimedia creation.
Nero Vision Xtra
The time has passed for the editing tool, Nero Vision Xtra, which includes Nero MediaHub and Nero Vision, which is almost perfect for creating any kind of optical disc in any kind of format (DVD, SVCD, VCD or Blu-ray) in a really easy way.
Nero Video Editor for PC Windows is a worthy successor adapted to the needs of modern times. Full compatibility with the Windows operating system (including the new Windows 10) and support for new high-quality video technologies are two of its most notable features.
Moreover, Nero Video is very easy to use. So simple that it doesn’t even require a tutorial. Although if you want to access the video tutorial, you can access it.
Nero Video’s main features
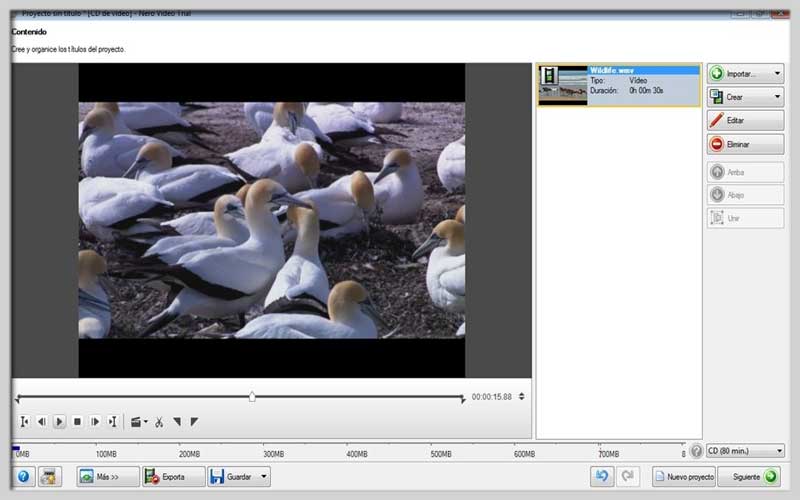
- Edit video.
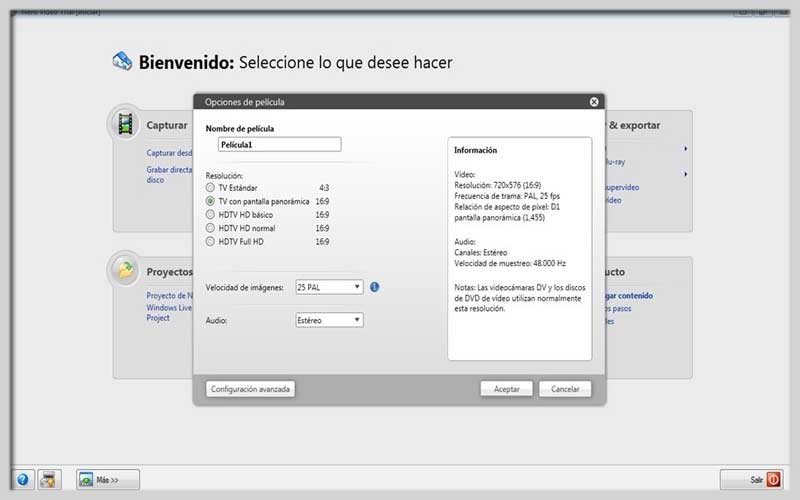
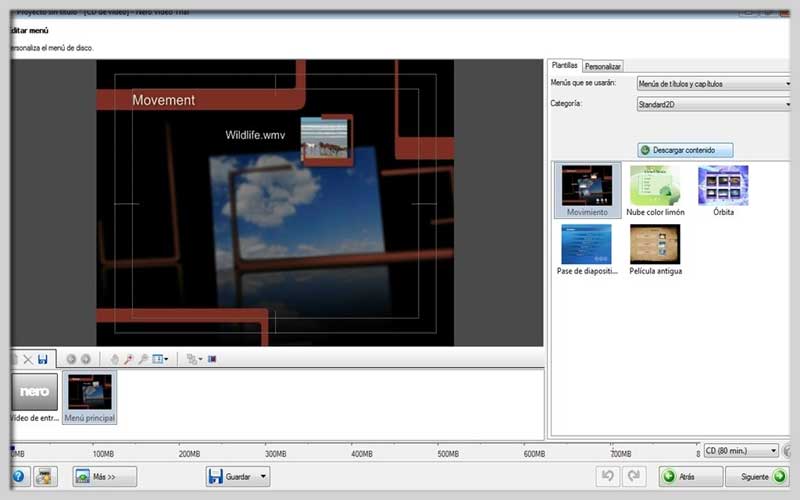
- Create discs: DVD and Blu-ray.
- Include topics (abstract, sports, holidays, family, etc.).
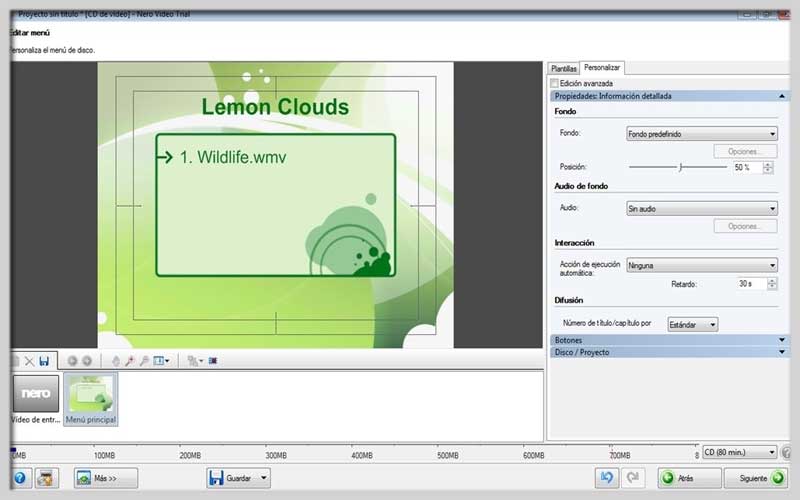
- Ability to use templates to create menus (2D, 3D, HD, animated).
- Includes transitions and templates.
- Supports AVCHD, MPEG-4 and BD-AV formats.
- Nero Kwik Media software included.
- There are many programs similar to Nero Video that you can download for free, but none of them give you guarantees about Nero.
Unleash Your Inner Filmmaker: A Guide to Nero Video
Nero Video is a powerful video editing software designed to help you create professional-looking videos on your Windows PC. It offers a range of features, from basic editing tools to advanced effects and multi-track editing. Here’s a roadmap to get you started:
1. Getting Started:
- Ensure you have Nero Video downloaded and installed on your Windows computer.
- Launch the program. You might encounter a welcome screen with project templates or options to open existing projects.
2. Importing Media:
- Click the “Import” button or go to “File > Import” to browse your computer’s files.
- Select the video clips, photos, and audio files you want to include in your video project. Nero Video supports various media formats, ensuring compatibility with most multimedia files.
3. Building Your Video (Timeline):
- The timeline is your editing workspace. Here, you arrange your media clips in the desired sequence. Drag and drop clips from the media library onto the timeline tracks.
- Nero Video offers multiple tracks for video, audio, and even titles or captions. This allows you to create layered and visually engaging videos.
4. Editing Techniques:
- Trimming & Splitting: Shorten clips by dragging the yellow handles at the beginning and end on the timeline. Use the “Split” tool (located in the context menu or editing toolbar) to cut a clip into sections for rearrangement or deletion.
- Transitions: Add smooth transitions between clips for a polished look. Nero Video offers a variety of dissolve, fade, and wipe effects. Explore the “Transitions” tab or drag and drop transition effects from the library onto the timeline between clips.
- Effects & Filters: Enhance your video with creative effects and filters. Explore options like color correction, slow motion, or artistic filters. Access these effects from the “Effects” tab or by right-clicking on a clip and selecting “Edit.” (Availability of specific effects may vary depending on your version).
5. Advanced Editing (Optional):
- Nero Video offers advanced editing features for experienced users. These include:
- Keyframe editing: Fine-tune specific aspects of a clip over time (e.g., adjust color balance throughout the clip).
- Motion tracking: Attach effects or text to specific objects within your video clips.
- Chroma key (green screen): Replace a green background with another video or image to create special effects.
6. Adding Polish:
- Titles & Text: Create titles, captions, or text overlays using the “Titles & Text” tab. Customize fonts, colors, animations, and positioning to suit your video’s style.
- Audio Editing: Adjust audio levels for individual clips, add background music, or record voiceovers using the audio editing tools. You can access these from the timeline or through the audio editing panel.
7. Exporting Your Masterpiece:
- Once you’re happy with your edit, click the “Export” button.
- Choose your desired output format (e.g., .mp4, .mov) based on your target platform or workflow. Nero Video offers presets for popular video-sharing websites and devices.
- Customize export settings like resolution, frame rate, and audio quality for optimal results. You can also choose to create a disc directly if you have a Nero burning suite.
- Click “Export” to render your final video and share your creation with the world!
Download Nero Video, your disc creation and editing software.
Screenshots