Record and capture the screen of your Windows PC with oCam 14.0.0, a complete and powerful tool for creating all kinds of video tutorials and taking screenshots
If you need to take a screenshot of your computer screen or record the action happening on your screen to create any kind of video tutorial or screencast, oCam is one of the best screen recording and recording tools out there. Best and fastest on the market.
As is the case with most screen capture tools, oCam for PC Windows comes with two clearly distinguished interfaces: one from which we will control all parameters, such as size. of the recording window, sound or record settings, pause, stop and capture buttons, and another green square representing the capture area.
Why is oCam better than other capture tools?
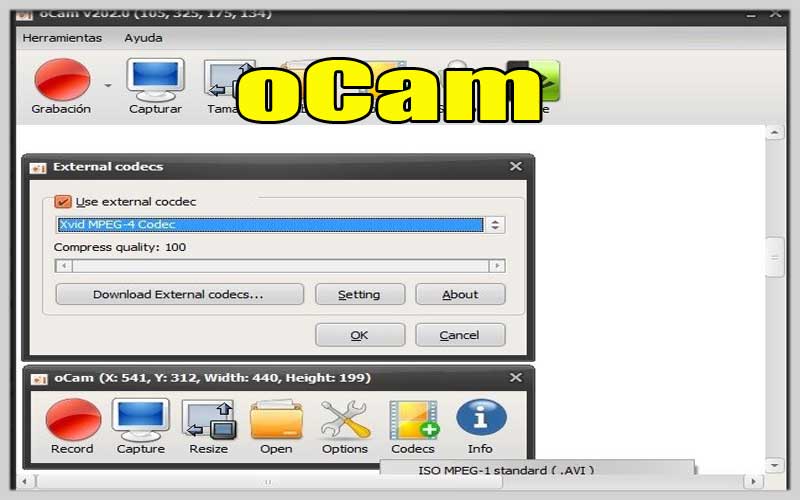
If we compare oCam with its most direct competitor, such as Screenpresso or Greenshot, for just a few examples, its great advantage is the ability to choose the codec with which we can record the screen. for your video tutorials.
Therefore, we can choose between creating GIFs or recording your screen using containers of MP4, MKV, AVI, MOV, WMV, FLV, M4V and VOB formats among many formats. other.
Screenshots


Snag What’s on Your Screen: A Guide to Using oCam
oCam is a free and lightweight screen recording software for Windows that allows you to capture anything happening on your desktop or specific applications. Here’s a breakdown on how to use oCam to record your gameplay, tutorials, or video calls:
1. Download and Installation:
- Head over to the official oCam website: https://ohsoft.net/
- Click the “Download” button to download the latest version of the software.
- Run the downloaded installer and follow the on-screen instructions to complete the installation.
2. User Interface:
- Upon launch, oCam presents a straightforward interface with several sections:
- Recording Mode: Choose between “Screen,” “Game,” or “Region” recording.
- Output Settings: Specify the video format (AVI or MKV), codec, and video quality.
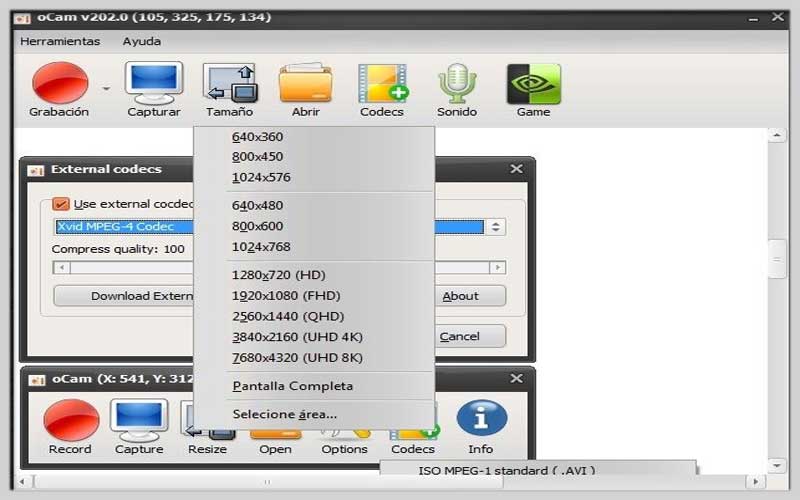
- Capture Area: Define the recording area for “Screen” or “Region” mode (entire screen, specific window, custom area selection).
- Audio Options: Enable/disable system audio (computer sounds) and/or microphone recording.
- Preview Window: (Optional) Provides a real-time preview of the selected recording area.
- Control Buttons: Record, Stop, Capture screenshot (optional).
3. Setting Up Your Recording:
Recording Mode:
- Screen: Captures everything on your entire desktop screen.
- Game: Optimizes recording for capturing gameplay with minimal performance impact. It automatically detects most running games.
- Region: Allows you to record a specific rectangular area of your screen.
Capture Area:
- For “Screen” mode, the entire screen is automatically selected.
- For “Game,” the running game window will be pre-selected. You can adjust if needed.
- For “Region,” use the mouse to drag and create a selection box defining the capture area.
Audio Options:
- Enable “System Sounds” to record audio from your computer (e.g., game sounds, music).
- Enable “Microphone” to record your voice narration during the capture.
4. Starting and Stopping Recording:
- Once you’ve configured your settings, click the big red “REC” button to initiate recording.
- Alternatively, you can use a pre-defined hotkey (configurable in settings) to start/stop recording.
- A small red recording bar will appear on your screen, indicating recording is in progress.
5. Managing Recordings (Optional):
- While recording, you can use the pause/resume buttons on the recording bar to temporarily stop and resume capture.
- To stop recording completely, click the red square button on the recording bar or press your hotkey again.
6. Accessing Your Recordings:
After stopping the recording, oCam will automatically open the folder containing the saved video file. The default location is usually your “Videos” folder.