If you want to edit and combine multiple videos and get a movie with professional results, Sony Vegas Pro 19 for PC is definitely one of your best choices.

The world of professional video editing from PC has several main actors. We could talk about Adobe Premiere, Final Cut, Lightworks or even Pinnacle Studio, but one of the programs that stands out the most in this area and delivers some of the best results is undoubtedly Sony Vegas Pro for PC Windows.
The software has been one of the most popular video rendering and post-production tools for many years, and although no longer belongs to Sony, but instead to Magix, has removed any reference to Sony from the name. its software, it continues to be one of the favorite software.
The program of video editing professionals, as it is one of the most intuitive solutions for manipulating audiovisual content in real time, although requires certain advanced knowledge and a lot of time. free time to make full use of all its functions.
Main Features of Magix Vegas Pro
Edit videos, images and audio with professional results.
Ability to edit videos from up to 32 different sources.
Timeline for simple and intuitive framing.
Introduce effects, transitions between tracks, and filters.
Shape and effect masking tools.
Create three-dimensional projects with stereoscopic 3D settings and the ability to add depth to 2D elements.
Compatible with multiple formats, including videos in 4K and RAW.
Various plug-ins are available to extend the complete functionality of the program.
What can we find in the new version of Vegas Pro?
Compared to the previous versions, the new version of this software released in September this year comes with a multitude of updates that improve the advanced editing functions available until now:
HEVC/H.265: thanks to this technology, users can compress their videos more without loss of quality, save storage space and simplify streaming.
Native support for ProRes: this software no longer depends on third-party applications to provide support for ProRes files, ensuring the lossless quality of the video.
Smart upscaling: thanks to new upscaling technology, we can convert HD recordings to 4K or UHD, keeping the picture quality intact.
Compatibility with High Frame Rate (HFR) images allows video professionals to get the most out of their cameras to record at higher FPS.
New option to speed up video up to 40 times the normal speed.
Smart zoom: in post-production, you can include zooms created after recording without any loss of image quality.
The new Hover Scrub function simplifies the process of indicating entry and exit points on video clips.
New plug-ins to introduce different video effects, such as vignettes.
Greater hardware support to make this program compatible with more video cameras.
New functionality for creating and authoring professional DVDs and Blurays.
And how much will this Vegas Pro cost me?
Well, considering all its functions and features, it certainly won’t come cheap.
However, you can try it for free for 7 days, which can be extended to 30 after the free registration process, but the software comes in 3 different versions with prices ranging from $400 for the Pro Edit version , to $800 for the Pro Suite version, with the standard Pro version hitting shelves for around $600.
Screenshots

Unleashing Your Creativity: A Guide to Using Sony Vegas Pro
Sony Vegas Pro (now VEGAS Pro) is a powerful video editing software prized for its intuitive interface, robust features, and efficient workflow. Whether you’re a seasoned video editor or a budding enthusiast, Vegas Pro offers the tools to bring your creative visions to life. Here’s a roadmap to navigate the core functionalities of Vegas Pro and kickstart your video editing journey:
Getting Started:
- System Requirements: Ensure your computer meets the minimum system requirements for running Vegas Pro. You can find these specifications on the VEGAS Creative Software website https://www.vegascreativesoftware.com/.
- Interface Tour: Upon launching Vegas Pro, familiarize yourself with the interface. The main workspace consists of the following areas:
- Menus: File, Edit, Project, etc., providing access to overall project settings and editing commands.
- Toolbar: Contains commonly used buttons for editing functions like trimming clips, adding transitions, and applying effects.
- Timeline: The central area where you arrange and sequence your video clips, images, audio tracks, and effects.
- Track Panel: Displays and allows management of various tracks for video, audio, and effects within your project.
- Preview Window: Shows a real-time preview of your edited video sequence.
Importing Media:
Importing Files: Use the “File” menu or drag-and-drop functionality to import video clips, images, and audio files into your project. Vegas Pro supports a wide range of file formats.
Organizing Media: Create folders within your project to organize your imported media files for easier access and management.
Building Your Edit:
Arranging Clips: Drag and drop video and image clips onto the timeline to arrange them in the desired sequence. You can trim clips by dragging their edges or using the editing tools in the toolbar.
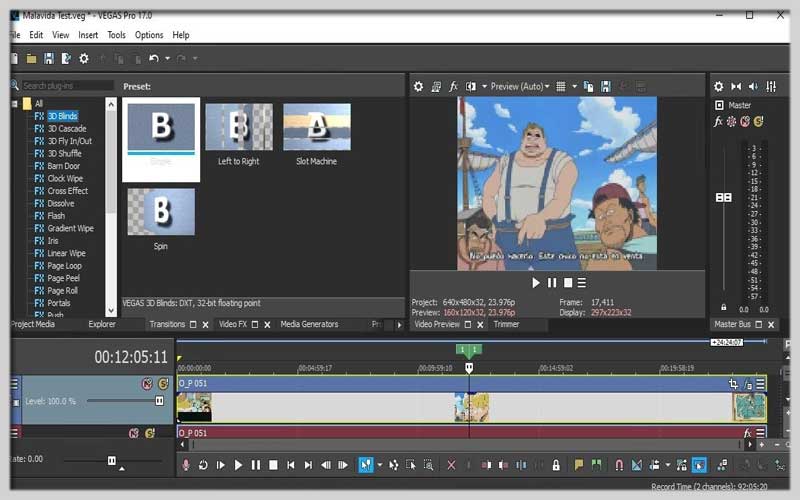
Adding Transitions: Apply transitions between clips to create smooth and polished transitions from one scene to another. Vegas Pro offers a variety of transition effects to choose from.
Enhancing Your Video:
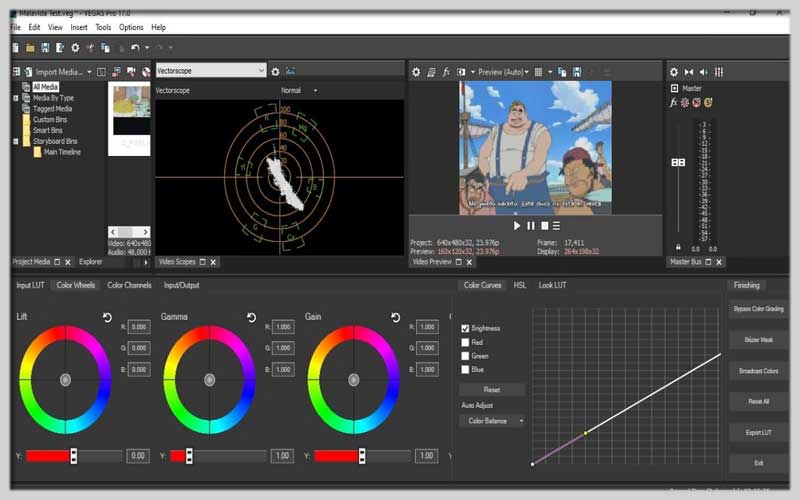
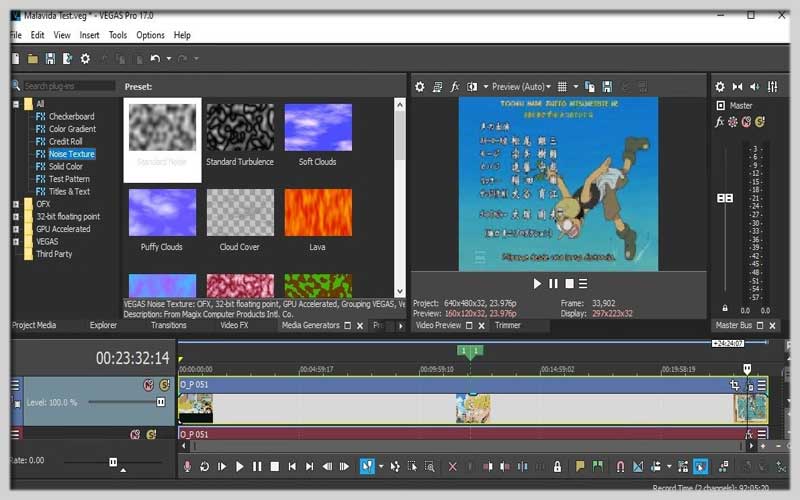
- Video Effects: Vegas Pro offers a vast library of video effects to enhance your footage. Adjust color correction, add blurs, sharpen images, and explore various creative effects to achieve your desired visual style.
- Audio Editing: Edit your audio tracks by adjusting volume levels, adding fades, and applying audio effects like equalization and noise reduction. You can also add music and sound effects to your project.
- Text and Overlays: Incorporate titles, captions, and other text elements using the Text tool. Create overlays with images or graphics to add visual interest to your video.
Finalizing Your Project:
Review and Polish: Preview your edited video in the preview window to ensure everything looks and sounds as intended. Make adjustments as needed.
Exporting Your Video: Choose the “Render” option to export your finished video project. Select the desired output format, resolution, and frame rate. Vegas Pro supports various export options for different purposes (e.g., YouTube upload, social media sharing, Blu-ray burning).