Make a music video, make a movie, add a Facebook video for your birthday… By downloading Video Editor you can do all of the following in the blink of an eye.

Feature
The internet is rife with programs that specialize in video editing, some of which can even be used online. In reality, the presence of the cloud is reaching limits we never dreamed of but the truth is that the programs that work best for complex tasks are still the ones that we have to install. put it on your hard drive.
Such is the case with Video Editor Master for PC Windows, developed by Queenloft and presented to users as a way to bring audiovisual creativity to life without any knowledge of the matter.
It’s a simple video editor for Windows 10, aimed at users who want to create small home movies without too much complexity.
It’s one of the new UWP apps (formerly Metro apps) that’s landed in the new Microsoft operating system, and you won’t need any kind of tutorial to get started. The software is very intuitive and simple, perfect for beginners who don’t require too much from a video editor.
How to use Video Editor Master
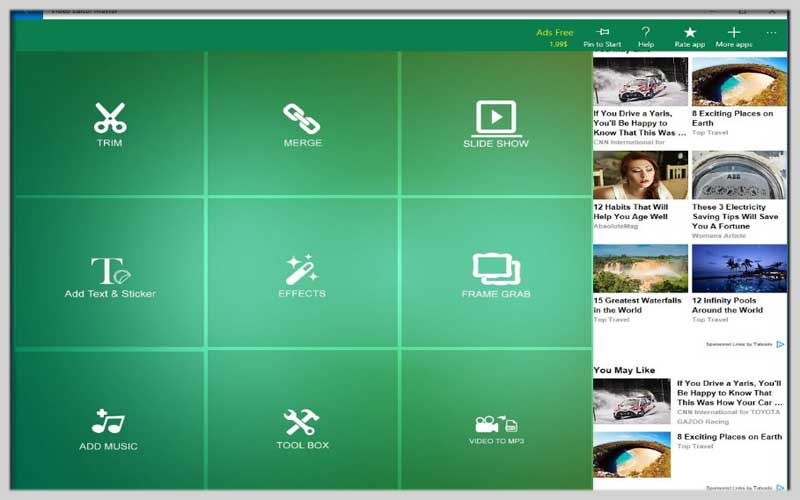
To start creating with this program, you just have to click on any of its many options. After doing so, choose a video, image, or audio file to work with.
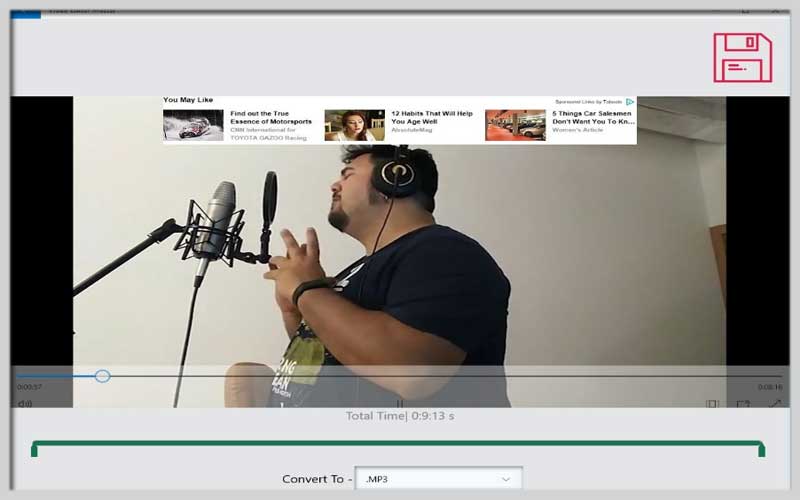
We can create small movies, simple music videos consisting of images and songs (even different montages in this line) or convert video files to MP3 format, among many other things. All later, in just a few clicks and have your video ready in less than a minute.
If you want to get hold of a simple, straightforward, intuitive and easy to use video editor that doesn’t cost a dime, this is it.
However, its ads can be a bit annoying. You can get rid of them by paying a small amount but that decision is yours.
1. Download and Installation:
- While the specific download source might vary, ensure you download Video Editor Master from a reputable website.
- Once downloaded, run the installation file and follow the on-screen instructions to complete the setup process.
2. User Interface:
- Upon launch, Video Editor Master presents a straightforward interface:
- Project Area: This central workspace displays your video project and timeline.
- Media Library: This pane stores your imported photos, videos, and audio files for easy access and organization.
- Editing Tools: Provides buttons for common editing functions like trimming, adding transitions, and effects.
- Preview Window: Displays a real-time preview of your edited video as you make changes.
3. Importing Media:
- Click the “Import” button (often a folder icon) or go to “File > Import” to browse your computer’s files.
- Select the video clips, photos, and audio files you want to include in your project. Video Editor Master supports popular video and image formats, ensuring compatibility with most multimedia files.
4. Building Your Video (Timeline):
- Drag and drop your media files from the media library onto the timeline tracks. You can have separate video and audio tracks, allowing you to create layered projects.
- Arrange the clips in the order you desire by dragging and dropping them on the timeline. You can also use the “Cut” and “Paste” functions for precise editing.
5. Basic Editing Techniques:
- Trimming Clips: Drag the yellow handles at the beginning and end of a clip in the timeline to shorten it.
Splitting Clips: Locate the split tool (often a razor blade icon) or right-click on a clip and choose “Split” to cut a clip into sections for rearrangement or deletion. - Transitions: Enhance the flow between clips by adding transitions. Explore the “Transitions” tab or section (icons may vary) and drag and drop a transition effect between two clips on the timeline.
6. Adding Polish (Optional):
- Titles & Text: Create titles, captions, or text overlays. Look for the “Titles” tab or button (often a “T” icon) and customize fonts, colors, animations, and positioning to suit your video’s style.
- Effects (Optional): Depending on your version of Video Editor Master, you might have access to basic effects. Explore the “Effects” tab or section (icons may vary) to add visual enhancements like greyscale, brightness adjustments, or artistic filters.
7. Exporting Your Video:
- Once you’re happy with your edit, click the “Export” button (often an arrow pointing out icon) or go to “File > Export.”
- Choose your desired output format (e.g., .mp4, .mov) based on your target platform or workflow. Video Editor Master might offer presets for popular video-sharing websites.
- Customize export settings like resolution, frame rate, and audio quality for optimal results. Click “Export” to render your final video and share your creation with the world!
Screenshots