Windows Movie Maker 2012 is a basic video editor included in the Windows Live Essentials tools package, ideal for users without any advanced editing knowledge.
When we talk about video editing on a PC, we often think of complex solutions that deliver near-professional results, as is the case with Adobe Premiere, Final Cut or Pinnacle Studio, and most of the time we forget. the average user, with no advanced knowledge, just wants to make a small edit and is not interested in the great features that previous products could offer us.
And for those cases, there is nothing better than a simple video editor like this Windows Movie Maker case. It has been around for years, helping inexperienced users in the video editing field out of their jams, since it was released for Windows ME to the latest Windows 10.
The product has not been on the market since 2012, but this latest version turned out to be the best of them all (much better than Movie Maker 2.1 or 2.6), still running on the most modern operating systems .
Main features
From a simple, sober and clean interface that barely evolves through different versions, you can perform the following actions:
Create your own movie or animation with photos or other videos.
Possibility to import video and fixed images or audio.
Optionally add music from our music library or download from online services.
Record video from webcam and narrate audio from microphone.
Modify a video’s frame sequence when dragging and dropping them on the timeline.
Increase or decrease the volume of narration, music, or video.
Add visual effects, transitions and subtitles.
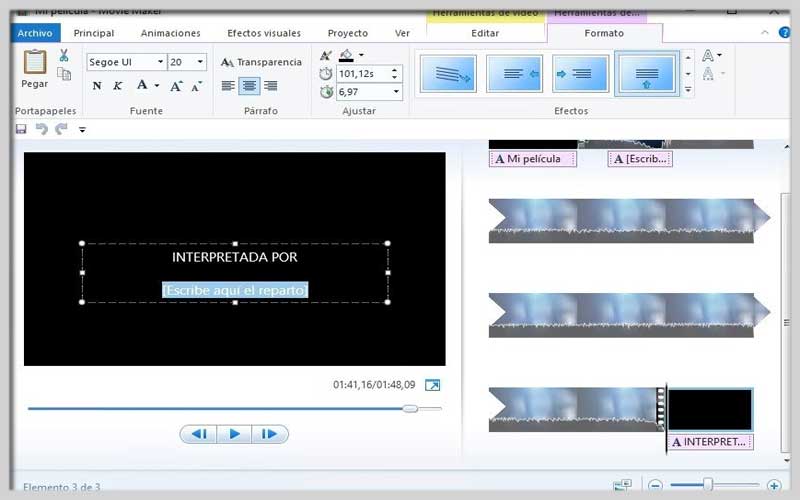
Combine opening or closing credits to name OST stars, directors, locations, or writers.
Preview your videos before completing them.
Save your creations locally, upload them to the cloud, or send them via email.
Where to download Windows Movie Maker for PC Windows? Where can I find its installer?
You are probably having a hard time finding an installation file for this program without too much success. That’s because it doesn’t exist as a standalone application but is included in the Windows Live Essentials toolkit.
You can still find the 2012 version of this software on the official Microsoft website by clicking on the link we give you through our download button.
By running the EXE file, you choose between installing all the programs that are part of the tools package, including Messenger, Mail, Writer, or OneDrve, or choosing the individual components to be installed.
In this case, Gallery & Movie Maker is like a product. Then just tap the Install button and wait for a few seconds for the process to complete.
Unleash Your Inner Filmmaker: A Guide to Windows Movie Maker 2012
Windows Movie Maker 2012 is a great tool for creating home videos and slideshows. Let’s dive into how you can use it to edit your clips and tell your story:
1. Importing Your Media:
- Open Movie Maker and click “Home” then “Add videos and photos.”
- Browse your computer’s files and select the videos or photos you want to use. Hold “Ctrl” to choose multiple files.
- Click “Open” to import your media. The import time may vary depending on file size.
2. Arranging and Editing:
- Your imported media will appear in the storyboard area below the preview window.
- Drag and drop clips to arrange them in the order you want them to appear in your video.
- To edit a clip, click on it in the storyboard. Editing options will appear above the preview window. Here’s what you can do:
- Trim: Shorten the clip by dragging the yellow sliders at the beginning and end of the clip in the preview window.
- Split: Cut the clip into sections by clicking “Edit” then “Split” at the desired point. You can then rearrange or delete unwanted sections.
3. Adding Polish:
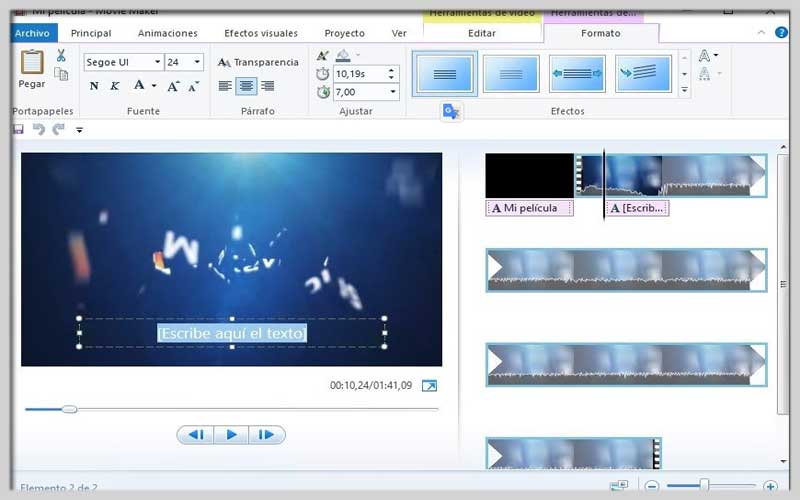
- Text & Titles: Click the “Titles & Credits” button to add text overlays, titles, or captions to your video. Choose from various fonts, colors, and animations.
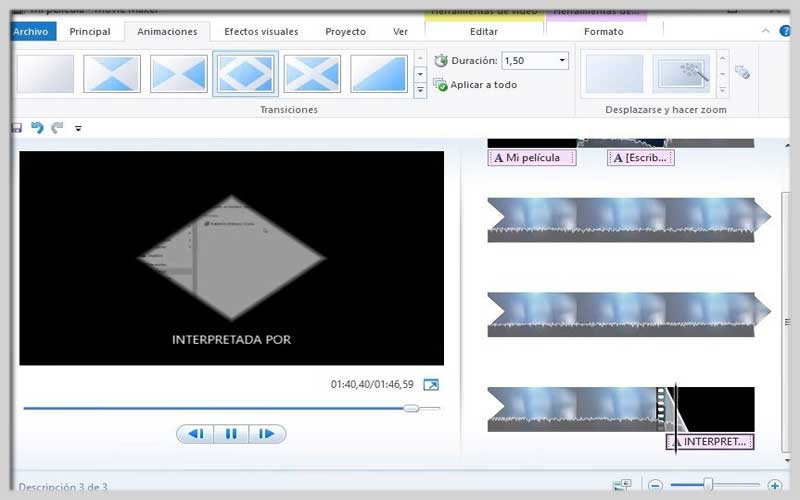
- Transitions: Make your clips flow smoothly by adding transitions between them. Click the “Transitions” tab and choose from various effects like fade, dissolve, or wipe.
- Music & Effects: Liven up your video with a soundtrack! Click “Home” then “Add music” to import your music or use the built-in library. Add sound effects by clicking “Home” then “Add music” and navigate to the sound effects option.
4. Final Touches and Sharing:
- Once you’re happy with your edits, click the “Publish” button on the Home tab.
- Choose how you want to save your video:
- Save to your computer in various video formats.
- Publish directly to YouTube, Facebook, or other platforms (availability may vary).
- Choose your desired video quality and resolution.
- Click “Publish” to export your creation and share your masterpiece with the world!
If you want to continue enjoying the advantages of Movie Maker 2012, you’ll have to hurry as Microsoft has announced that it will no longer be available after January 2017, replacing the app with a much more modern version. on its Windows. Shop.
Screenshots