dupeGuru is one of the tools that are obtainable and free to clean and optimize your computer. Download the app for PC Windows 7/8/10 to check how easy it works!
About dupeGuru Windows PC
It’s a program that Hardcoded Software launches to help the user solve multiple issues. These are some of the main functions:
- Spot and eliminate duplicates from the machine
- Recover free space on your PC
Origin of problems
When using a computer, the hard drive will gradually contain a lot of duplicate files. They are often useless and even harmful. Additionally, they will occupy or fill up valuable space on the hard drive.
It’s impossible for you to search for them manually. It is the reason that you should choose a program like the current app to handle your trouble.
In fact, it is a simple software that can find out all of those files and remove them.
How to use
Here is the explanation about how you utilize dupeGuru for PC Windows. It includes information about the most crucial ability as well.
How to begin
You need to select the folders that you expect to analyze.
Afterward, the tool will analyze them and seek out every coincidence.
In the new window, you’ll see the name of the target, the coincidence percentage, where they are, with their size.
Next, you can choose the files that you’d like to delete. Remember to send them to the recycling bin!
Note that the present equipment only gets rid of the files that it can clear from the system. The utility will not influence files that are necessary to the computer’s functioning. When the analysis process ends, you can save the results to test them.
Installing dupeGuru
Step 1: Download dupeGuru
- Open your web browser and go to the dupeGuru official website.
- Navigate to the Download section.
- Select the appropriate version of dupeGuru for your operating system (Windows, macOS, or Linux).
- Click the download link to start downloading the installer file.
Step 2: Install dupeGuru on Windows
- Locate the downloaded installer file, typically named
dupeGuru_win_x.y.z.exe(where x.y.z is the version number), in your Downloads folder. - Double-click on the installer file to launch the installation process.
- If prompted by User Account Control, click Yes to allow the installer to make changes to your device.
- Follow the on-screen instructions:
- Choose the installation folder or proceed with the default location.
- Click Install to begin the installation process.
- Once the installation is complete, click Finish.
Step 2: Install dupeGuru on macOS
- Locate the downloaded disk image file, typically named
dupeGuru_macOS_x.y.z.dmg, in your Downloads folder. - Double-click on the disk image file to mount it.
- Drag the dupeGuru application icon to the Applications folder.
- Once the copy is complete, you can eject the disk image.
Step 2: Install dupeGuru on Linux
- Open a terminal window.
- Depending on your Linux distribution, you might need to install additional dependencies. Refer to the dupeGuru installation guide for specific instructions.
- Download the appropriate package or use the following commands:
- For Debian-based systems (e.g., Ubuntu):
bashcoppy
sudo apt install dupeguru
- For other distributions, follow the instructions provided on the dupeGuru website.
- For Debian-based systems (e.g., Ubuntu):
Using dupeGuru
Step 1: Launching
- Open dupeGuru from your Applications folder (macOS), Start menu (Windows), or via the terminal (Linux) by typing
dupeguru.
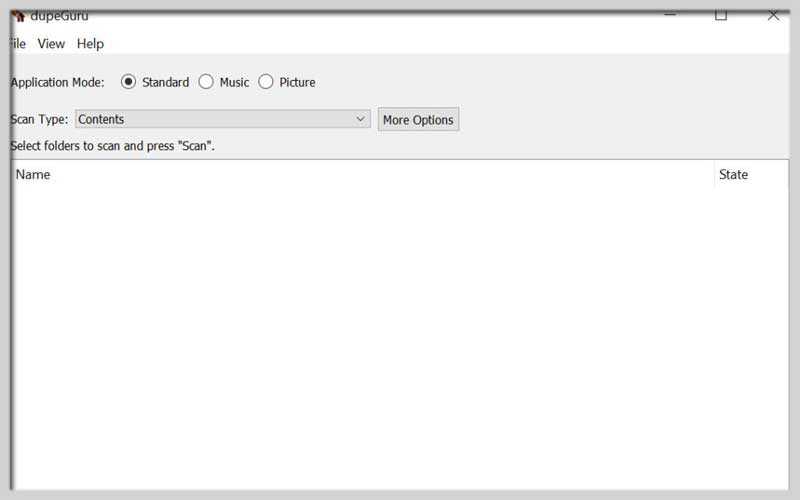
Step 2: Configuring Scan Settings
- When you launch dupeGuru, you will be presented with a simple interface.
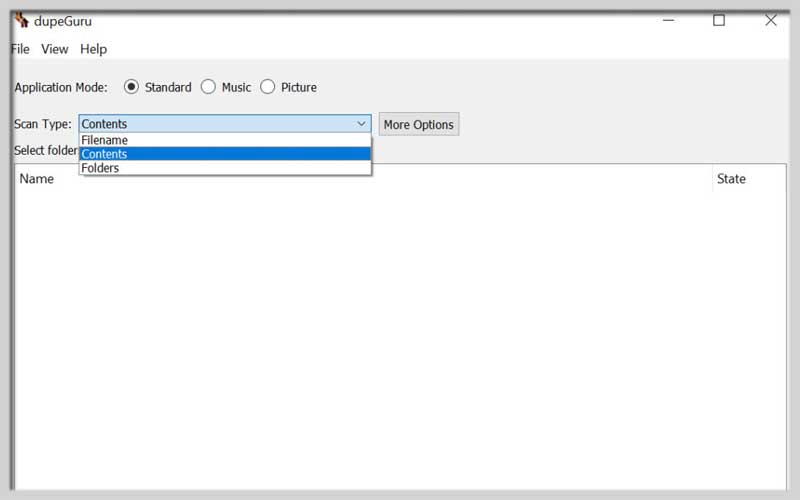
- Choose the scan type:
- Standard: Scans for duplicate files based on filenames and contents.
- Music: Scans for duplicate music files by comparing tags and contents.
- Pictures: Scans for duplicate images based on content.
- Click + (Add) to select the folders you want to scan for duplicates. You can add multiple folders if needed.
Step 3: Running the Scan
- After adding the folders, click Scan to start the process.
- dupeGuru will analyze the selected folders and list potential duplicates.
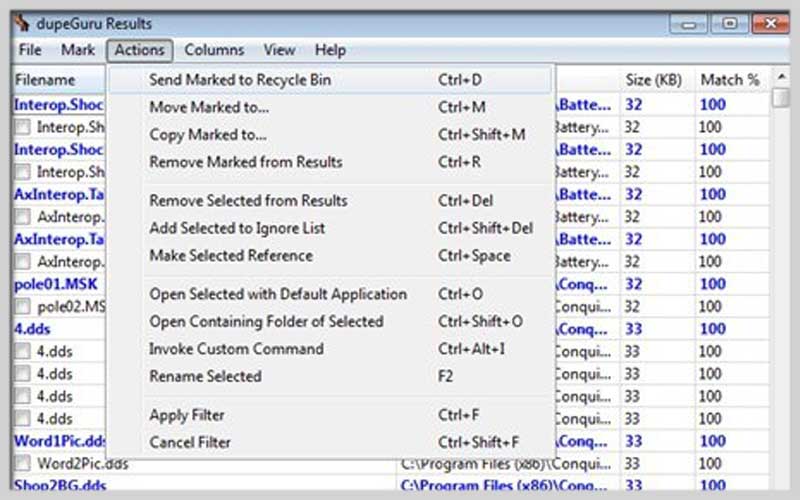
Step 4: Reviewing and Managing Duplicates
- Once the scan is complete, dupeGuru will display a list of duplicate files.
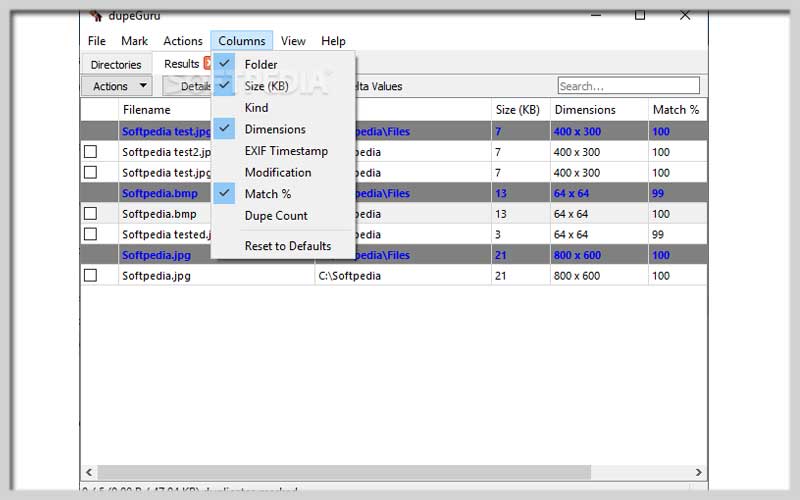
- Review the results:
- The results are grouped, showing the original file and its duplicates.
- You can click on each entry to see more details.
- Use the checkboxes to select the duplicates you want to delete or move.
- Choose an action:
- Delete: Permanently removes the selected duplicates.
- Move to Trash: Moves the selected duplicates to the trash/recycle bin.
- Copy/Move: Copies or moves the selected duplicates to a different folder.
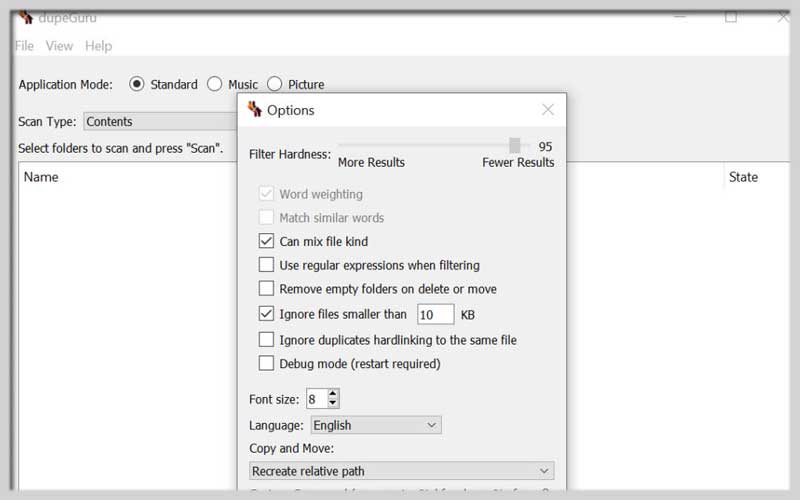
Step 5: Fine-Tuning Scan Results
- Use the Filter and Sort options to narrow down the scan results and focus on specific types of files or locations.
- Adjust the Scan Type settings to refine how dupeGuru identifies duplicates (e.g., filename, content similarity).
dupeGuru is a free tool to clean and optimize for PC Windows. It requires you to download and install a 64-bit operating system.
Screenshots