Glary Utilities is a tool to clean and optimize the performance of your computer. It is free for you to download and run for PC Windows 7/8/10!

Glary Utilities allows users to improve their PC
Just download the present utility and you can embark on optimizing and cleaning the computer easily.
Obviously, not updating the PC regularly will decrease how it performs. It can accumulate useless and even harmful stuff.
With the current application, you are able to recover your machine quickly without charge.
Have everything essential for cleaning and optimization
The fact that your PC will contain unessential files when you carry out installing, uninstalling apps, or browsing the Internet.
These items are the cause that makes your personal computer work slowly and ineffectively.
The existing solution is one of the best ones to help you handle that problem.
List of tools
Glary Utilities for PC Windows is a place where you can experience a series of tools as follows.
Cleaning and fixing
Available utilities will rapidly clear programs with files that are not important anymore. Additionally, they can clean up the Windows registry.
Optimization
Enhance the system startup and restore the memory with the way that the system runs
Searching
You can find files and folders, analyze them to seek out duplicated files, empty directories, and more.
Security
You can eliminate browser history and defend your files from being used without permission.
Others
Together with the advantages above, you can explore a process manager, an assistant for Internet Explorer. The collection includes some tools that can make accessing Windows possibilities simpler as well.
How to Install and Use Glary Utilities
Introduction
Glary Utilities is a comprehensive system cleaner and performance booster for your Windows PC. It offers a one-stop solution for PC performance optimization, privacy protection, and malware removal. Here’s a step-by-step guide on how to install and use Glary Utilities effectively.
Installing Glary Utilities
Step 1: Download Glary Utilities
- Open your web browser and go to the Glary Utilities official website.
- Click on the Download Now button. This will start downloading the installer file to your computer.
Step 2: Install Glary Utilities
- Locate the downloaded installer file, typically named
gusetup.exe, in your Downloads folder. - Double-click on the installer file to launch the installation process.
- If prompted by User Account Control, click Yes to allow the installer to make changes to your device.
- Follow the on-screen instructions:
- Select your preferred language.
- Review and accept the License Agreement by checking the appropriate box.
- Choose the installation folder or proceed with the default location.
- Click Install to begin the installation process.
- Once the installation is complete, you can choose to launch immediately by checking the corresponding option and clicking Finish.
Using Glary Utilities
Step 1: Launching
- Open Glary Utilities by double-clicking its desktop icon or by finding it in your Start menu.
Step 2: Familiarizing Yourself with the Interface
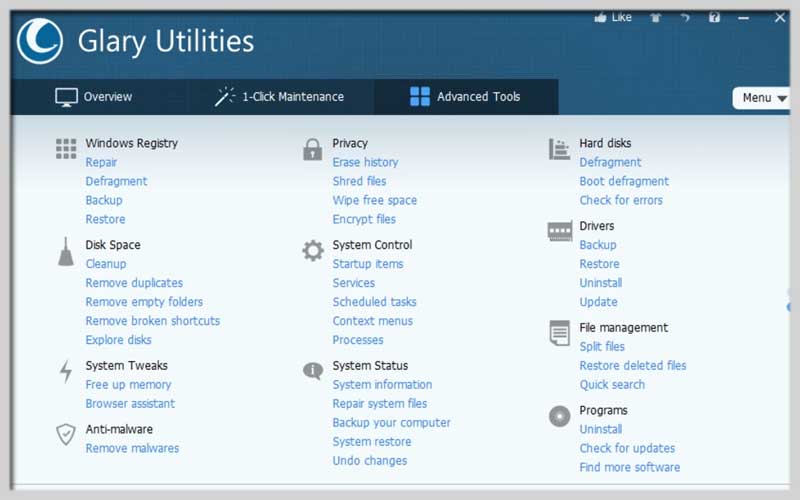
- Overview: The main interface provides quick access to various tools and features.
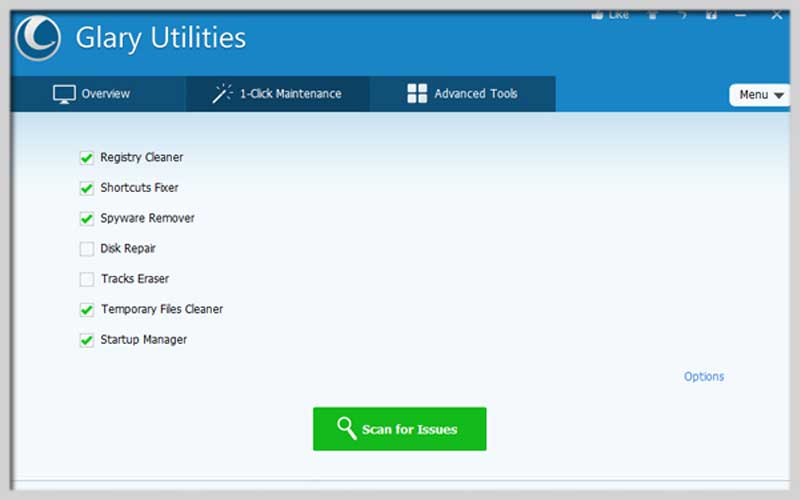
- One-Click Maintenance: This tab offers a quick way to run multiple optimization tasks with a single click.
- Advanced Tools: Here you can find a range of specific utilities for different tasks, such as disk cleanup, registry repair, and privacy protection.
Step 3: Running One-Click Maintenance
- Go to the One-Click Maintenance tab.
- Select the tasks you want to perform. Options typically include:
- Registry Cleaner
- Shortcuts Fixer
- Startup Manager
- Temporary Files Cleaner
- Tracks Eraser
- Spyware Remover
- Click the Scan for Issues button. Glary Utilities will scan your system for problems.
- Once the scan is complete, review the results and click Repair Problems to fix the issues.
Step 4: Using Advanced Tools
- Go to the Advanced Tools tab.
- Browse through the categories and select the tool you need. Some popular tools include:
- Disk Cleanup: Frees up space by removing unnecessary files.
- Registry Repair: Fixes issues in the Windows Registry.
- Uninstall Manager: Helps you uninstall unwanted programs.
- Startup Manager: Manages which programs start with Windows.
- Memory Optimizer: Frees up RAM to improve system performance.
- Follow the on-screen instructions for each tool to optimize your PC.
Step 5: Scheduling Automatic Maintenance
- Open Glary Utilities and go to the Scheduled Tasks section, usually found under the One-Click Maintenance tab.
- Click Add Schedule.
- Choose the tasks you want to run automatically.
- Set the frequency and timing for the automatic maintenance.
- Click OK to save your schedule.
Glary Utilities is a valuable tool for PC Windows customers. It’s not only free to download but also convenient to clean, optimize your PC. Click the button and you can interact with every content that the program offers!
Screenshots