
Win32 Disk Imager 1.0.0 is a lightweight tool that allows us to create virtualized disk images on flash memory such as SD cards or USB sticks.

Do you need to burn discs on a USB stick or SD card? Well, one possible solution could be to download Win32 Disk Imager for PC Windows which is a really lightweight tool and doesn’t consume too many resources.
Saving CD or DVD images on flash memory units creates a virtual disc player
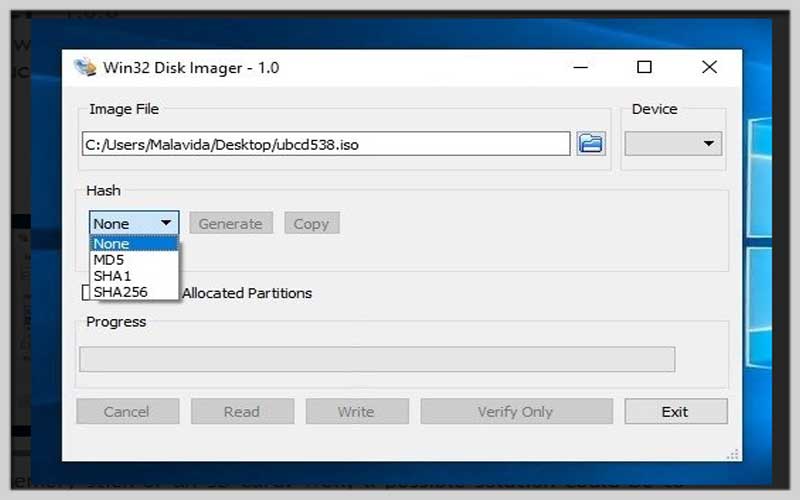
This program, which does not require any kind of installation, is really easy to use: we simply need to unzip the program and choose from our hard drive the image that we want to burn and the device of the device. where we want to save it.
In a few seconds, our USB stick or memory stick will become a virtual CD that we can use for the purpose for which it was created.
All in all, if you are looking for a lightweight tool to burn disk images in virtual IMG format to a flash memory card, then this tool is one of the best options available due to its simplicity and resource consumption. short.
Screenshots
Working with Drives: A Guide to Win32 Disk Imager
Win32 Disk Imager is a free and straightforward tool for Windows that lets you create backups of storage devices or write disk image files to removable drives. Here’s how to use it for these tasks:
1. Downloading Win32 Disk Imager:
Head over to the Win32 Disk Imager download page on SourceForge.net: https://sourceforge.net/projects/win32diskimager/files/Build%20Tools/.
Click the green “Download” button to download the latest version of the software.
The downloaded file will be a compressed archive (usually .zip). Extract the files using a program like WinRAR or 7-Zip.
2. Running Win32 Disk Imager:
No installation is required! Simply double-click the “Win32DiskImager.exe” file to launch the program.
3. Backing Up a Drive (Creating an Image File):
Select the Device: Connect the storage device you want to create an image of (e.g., USB drive, SD card) to your computer.
In the Win32 Disk Imager window, under “Device,” use the dropdown menu to select the drive letter corresponding to your device. Caution: Make sure you select the correct drive to avoid accidentally erasing data from the wrong device!
Choose the File Path: Click the blue folder icon next to “Image File.” Browse your computer and select a location to save the backup image file.
Filename and Format: Give your image file a descriptive name (e.g., “MyDriveBackup.img”). By default, the file format will be “.img” which is compatible with Win32 Disk Imager.
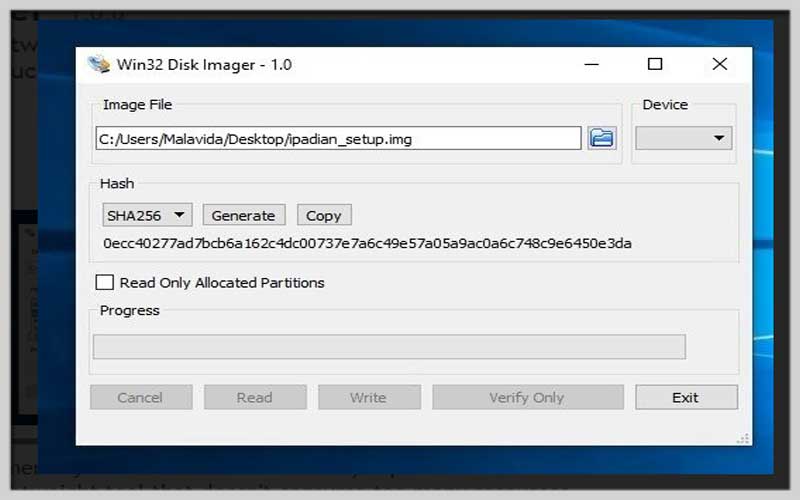
Click “Read”: Once you’ve selected the device, file path, and filename, click the “Read” button. This will start the process of creating an image file of your chosen device. The progress will be displayed in the window.
4. Writing an Image File to a Drive:
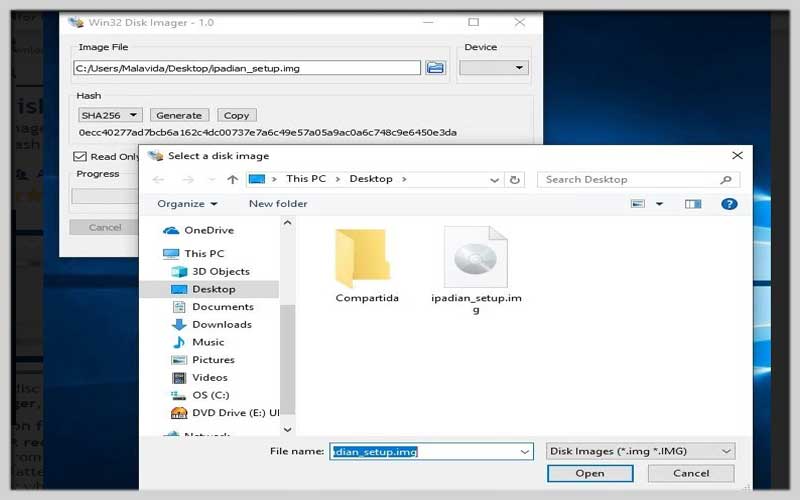
Select the Image File: Click the blue folder icon next to “Image File” and browse to the location of the disk image file you want to write to a removable drive (e.g., USB drive, SD card).
Select the Device: Use the dropdown menu under “Device” to choose the drive letter corresponding to the removable drive where you want to write the image. Extreme Caution: This will erase all existing data on the selected drive! Ensure you have the correct drive selected and have backed up any important data beforehand.
Click “Write”: Double-check your selections for both the image file and the target drive. Clicking “Write” will start the process of writing the image file to the chosen drive. This can take some time depending on the size of the image file.


