You can load instruments and VST plug-ins using the Rack Performer that is free to download for PC Windows 7/8/10. No need to use outside sequencers!
Make your live music performances more amazing with Rack Performer
Most musicians have to use external sequencers for loading instruments, virtual effects, as well as VST plug-ins. However, by using the above program, you don’t need to install any external sequencers for doing the loading thing. It is because it helps you load all instruments in a simple way. You can also add as many instruments with effects as you want. The interface of the program is quite great, making it easy to use as well.
You can perform a lot of live music performances using this program. It is also because it fits the user’s needs. You will find it easy to connect four physical screens with which you approach all the interfaces, which utilizes MIDI controllers. Here are the features of the program:
- It provides you with edition and performance modes.
- It supports various screens at the same time.
- The virtual screens are not scrollable.
- You can make changes to the graphical interface to your likings.
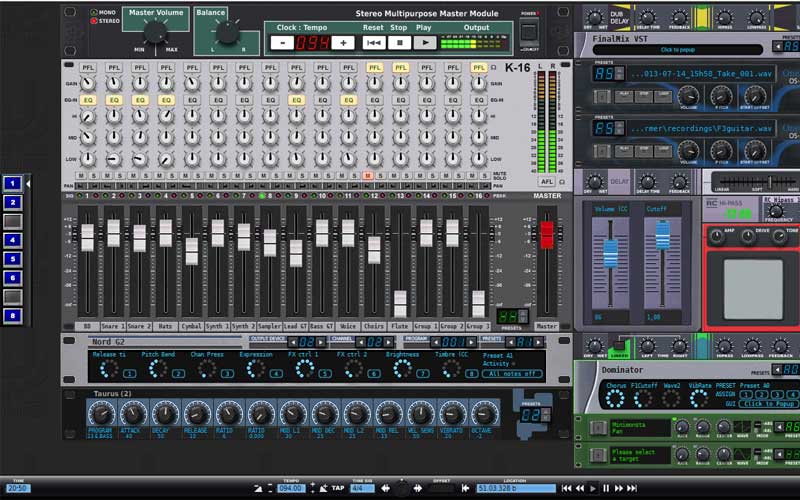
- You will experience a modular environment.
- By assigning output channels, you can monitor the audio.
- Every module is also equipped with a preset bench.
- The program is consistent with the matching quality standards.
How to Use Rack Performer
Introduction to Rack Performer
Rack Performer is a modular live audio software designed for live performance, sound design, and real-time audio processing. It offers a flexible and powerful environment for musicians, sound designers, and performers to create and manipulate sound in real-time.
Getting Started
1. Installation:
- Download Rack Performer from the official website.
- Run the installer and follow the on-screen instructions to install the software on your computer.
- Launch Rack Performer after installation.
2. Setting Up Your Audio Interface:
- Open Rack Performer and go to the
Preferencesmenu. - Select the
Audiotab and choose your audio interface from the list of available devices. - Configure the input and output channels according to your setup.
- Adjust the buffer size to balance between latency and performance.
3. Setting Up MIDI Controllers:
- In the
Preferencesmenu, go to theMIDItab. - Add your MIDI devices and configure them as needed.
- Assign MIDI channels to the corresponding devices.
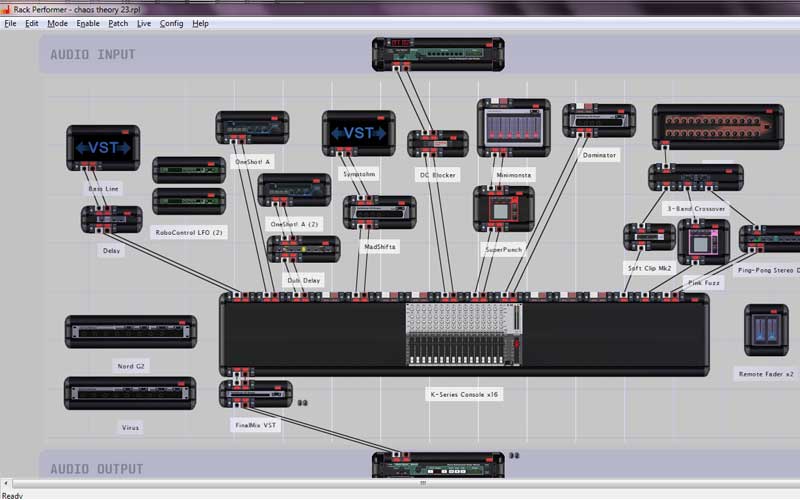
Building Your Rack
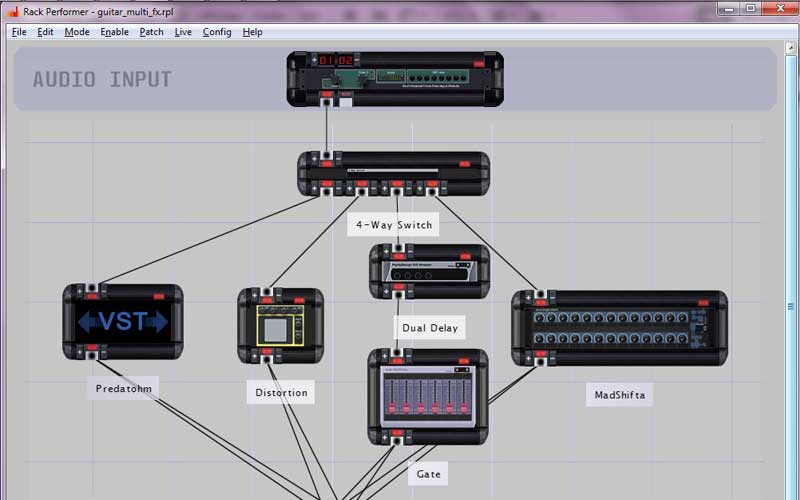
1. Adding Modules:
- Click on the
Modulestab to browse the available modules. - Drag and drop modules into the main workspace to add them to your rack.
- Common modules include oscillators, filters, effects, and mixers.
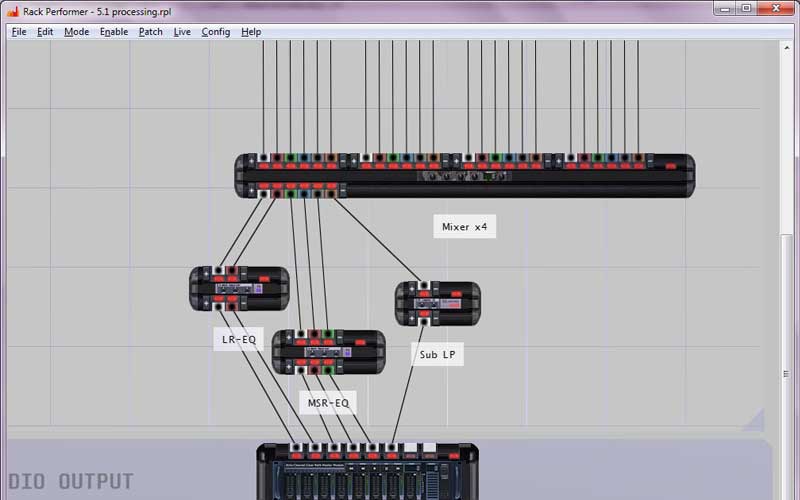
2. Connecting Modules:
- Click and drag from the output of one module to the input of another to create a connection.
- Use the right-click menu to add, remove, or adjust connections.
- Organize your modules logically to keep your workspace tidy.
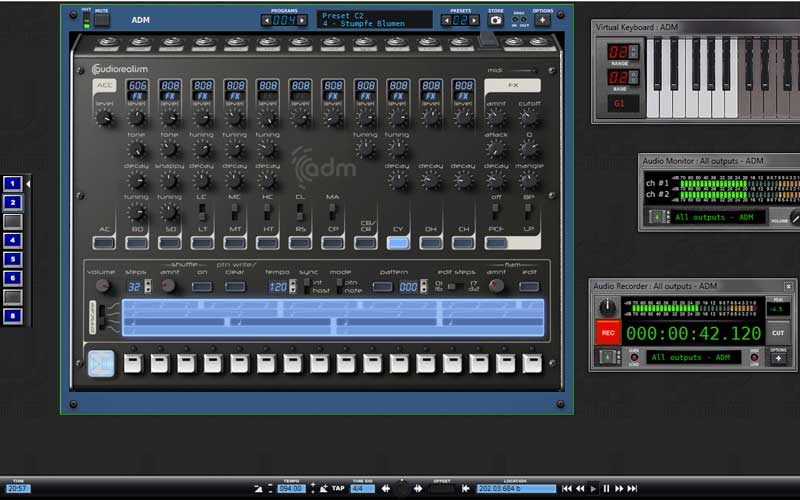
3. Adjusting Module Parameters:
- Click on a module to view its parameters in the parameter panel.
- Use sliders, knobs, and other controls to adjust the parameters.
- Save presets for modules to quickly recall your favorite settings.
Performing Live
1. Creating a Setlist:
- In the
Setlisttab, add new songs or sets for your performance. - Arrange the order of your songs or sets to match your performance flow.
- Use the
Notessection to add reminders or cues for each set.
2. Mapping Controls:
- Use the
MIDI Learnfeature to map hardware controls to software parameters. - Right-click on a control and select
MIDI Learn, then move the hardware control you want to assign. - Save your mappings to quickly recall them during performances.
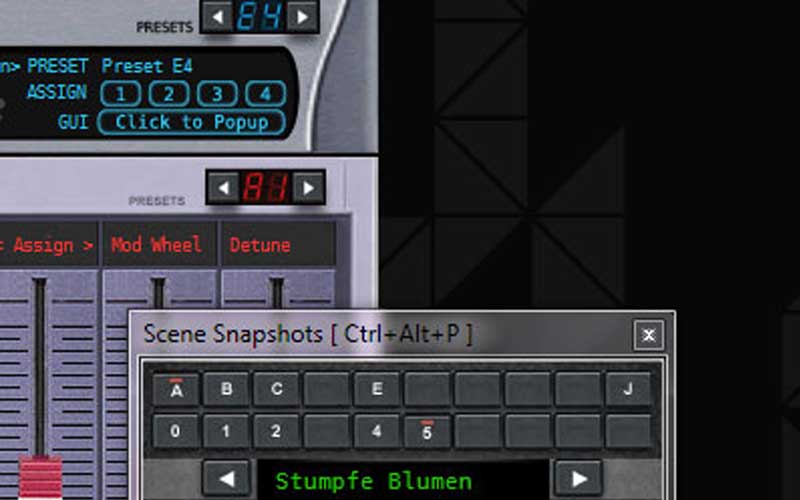
3. Using Scenes:
- Create and manage scenes to switch between different setups or configurations.
- Use scenes to quickly change effects, instruments, or routing during a performance.
- Trigger scenes manually or automate them using MIDI or timeline events.
4. Recording Your Performance:
- Use the built-in recorder to capture your performance.
- Configure the recording settings in the
Preferencesmenu under theRecordingtab. - Start and stop recording using the controls in the main interface.
Advanced Techniques
1. Using Scripts and Automation:
- Rack Performer supports scripting for advanced control and automation.
- Write scripts to automate complex tasks or to create custom interactions between modules.
- Use the
Scriptingtab to create and manage your scripts.
2. Integrating External Gear:
- Connect external hardware synthesizers, drum machines, and effects units to Rack Performer.
- Route audio and MIDI to and from external gear to incorporate them into your setup.
- Sync Rack Performer with other hardware using MIDI clock or other synchronization methods.
3. Customizing the Interface:
- Tailor the Rack Performer interface to suit your workflow.
- Resize and rearrange panels, create custom module groups, and save layout presets.
- Use keyboard shortcuts to speed up your workflow.
Troubleshooting
1. Audio Dropouts or Latency Issues:
- Increase the buffer size in the audio preferences.
- Ensure your computer meets the minimum system requirements.
- Close other applications that might be using CPU or memory resources.
2. MIDI Connection Problems:
- Check that your MIDI device is properly connected and powered on.
- Verify the MIDI settings in Rack Performer.
- Ensure that MIDI channels and ports are correctly assigned.
3. Module or Plugin Issues:
- Ensure all modules and plugins are up to date.
- Check for compatibility issues with your operating system.
- Consult the Rack Performer forums or support for specific module issues.
Rack Performer on Windows is free to download with a trial version for PC Windows. You can approach all features in the trial version. However, you cannot save documents as well as record audio.
Screenshots